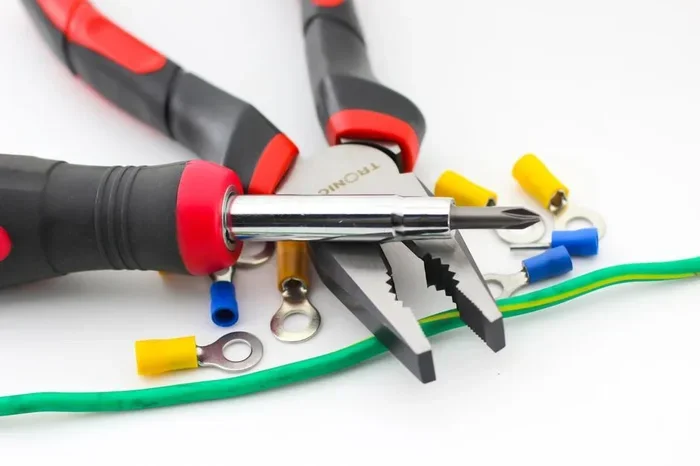
How to Disconnect Toyota Electrical Connections Safely
Knowing how to disconnect Toyota electrical connections is a must for every Toyota owner. Whether you are replacing a part, doing maintenance, or troubleshooting an issue, this guide walks you through the entire process safely. You will learn the right tools, step-by-step methods, and common mistakes to avoid. Our expert tips help protect your vehicle and keep you confident during the job.
Working on your Toyota can feel intimidating, especially when you are dealing with electrical connections. The good news is that disconnecting Toyota electrical connections is simpler than most people think. You do not need to be a mechanic to handle this task safely and confidently.
Whether you are replacing a faulty sensor, upgrading a stereo, or just doing routine maintenance, understanding how to properly remove electrical connectors is essential. This guide covers everything you need to know. From the tools required to the step-by-step process, we have you covered. By the end, you will feel ready to tackle any electrical connection on your Toyota.
Let us start with the basics. Every Toyota uses a series of electrical connectors to link sensors, modules, and components. These connectors come in different shapes and sizes. Some lock in place with a small tab, while others push in and pull out. Knowing what type you are dealing with makes the job much easier.
Key Takeaways
- Always disconnect the negative battery terminal first to prevent short circuits and electrical damage.
- Use the correct tools like a fuse puller, connector release tool, and dielectric grease for safe removal.
- Take photos before disconnecting any connector to remember the original wiring layout.
- Check for locking tabs on every Toyota connector to avoid breaking the clip during removal.
- Clean terminals and apply dielectric grease after reconnection for long-lasting performance.
- Wait at least five minutes after disconnecting the battery before touching any wiring to let capacitors discharge.
- Consult your Toyota owner manual for model-specific connector locations and diagrams.
📑 Table of Contents
- Why You Need to Disconnect Toyota Electrical Connections
- Tools You Will Need
- Step-by-Step Guide to Disconnecting Toyota Electrical Connections
- Common Toyota Electrical Connectors and How to Handle Them
- Safety Tips and Precautions
- Reconnecting and Testing Your Toyota Electrical System
- Maintenance Tips for Toyota Electrical Connections
- Final Thoughts
Why You Need to Disconnect Toyota Electrical Connections
There are many reasons why you might need to disconnect electrical connections on your Toyota. Understanding the purpose helps you approach each task with the right mindset and preparation.
Here are the most common reasons:
- Replacing a faulty sensor like an oxygen sensor or crankshaft position sensor
- Upgrading your audio system or installing new accessories
- Performing battery maintenance or replacing an old battery
- Troubleshooting electrical issues such as flickering lights or error codes
- Removing a component like a fuel pump, starter motor, or alternator
- Installing aftermarket parts such as dash cameras or alarm systems
No matter the reason, the process follows similar principles. Safety always comes first. Taking the right precautions protects both you and your vehicle.
Understanding Your Toyota Electrical System
Before you start pulling wires, it helps to understand the basics of how your Toyota electrical system works. Your battery provides power to the entire electrical network. Fuses protect individual circuits from overloads. Relays switch power on and off to different components. And the wiring harness connects everything together.
Each connector in this system has a specific job. A Toyota sensor connector sends data to the engine control unit. A Toyota relay connector carries high current to components like the fuel pump. Understanding these roles helps you handle each connector with care.
Tools You Will Need
Having the right tools makes all the difference. You do not need a expensive toolbox, but a few key items will save you time and frustration.
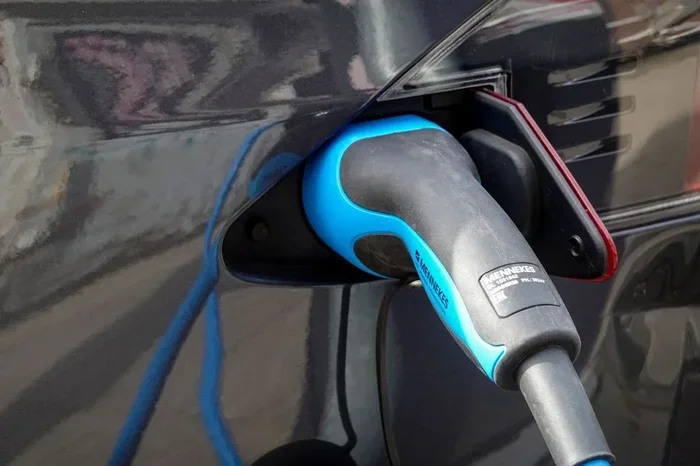
Visual guide about Toyota electrical connector disconnect
Image source: images.pexels.com
Here is a list of tools you should gather before starting:
- Socket wrench set for battery terminal removal
- Connector release tool (also called a lock pin removal tool)
- Toyota fuse puller for removing fuses safely
- Multimeter for testing connections
- Dielectric grease for protecting connections after reassembly
- Wire brush or terminal cleaner for cleaning battery posts
- Camera or phone for taking photos before disconnection
- Rubber gloves and safety glasses for personal protection
Most of these tools are inexpensive and available at any auto parts store. The connector release tool is especially important. Toyota connectors use small locking tabs that require a specific tool to release without damage.
Quick Tip: Label Everything
Before you remove a single connector, take clear photos of the wiring layout. Use small pieces of tape and a marker to label each connector if needed. This simple step saves a lot of confusion during reassembly.
Step-by-Step Guide to Disconnecting Toyota Electrical Connections
Now let us walk through the actual process. Follow these steps carefully and you will disconnect any Toyota electrical connection with confidence.
Step 1: Turn Off the Ignition and Remove the Key
Start by turning the ignition to the off position. Remove the key from the ignition switch. This prevents any accidental power flow while you work. If your Toyota has a push-button start, make sure the vehicle is completely off and the key fob is away from the car.
Wait at least five minutes after turning off the ignition. This allows the capacitors in the electrical system to discharge. It also resets any sensitive electronic modules, reducing the risk of damage.
Step 2: Disconnect the Negative Battery Terminal
This is the most important safety step. Locate the negative battery terminal, which is marked with a minus sign (-). It is usually a black cable. Using your socket wrench, loosen the nut on the negative terminal clamp.
Once loose, carefully pull the cable off the battery post. Tuck it away from the battery so it cannot accidentally touch the terminal again. This ensures the entire electrical system is de-energized.
Always disconnect the negative terminal first. Removing the positive terminal first can cause a short circuit if your wrench accidentally touches metal parts of the car.
Step 3: Locate the Connector You Need to Remove
Now find the specific connector you need to disconnect. Refer to your Toyota owner manual or a wiring diagram for guidance. Toyota connectors are typically located near sensors, modules, and fuse boxes.
Take a photo of the connector before touching it. Note how it sits, which direction it plugs in, and whether there are any locking mechanisms.
Step 4: Release the Locking Tab
Most Toyota electrical connectors have a small locking tab or clip. You need to press or release this tab before pulling the connector apart. Use your connector release tool or a small flat-head screwdriver for this step.
Gently squeeze or push the tab while pulling the connector body. Do not pull on the wires themselves. Pulling on the wires can damage the connection or break the wire inside the harness.
Here are some tips for releasing different connector types:
- Push-tab connectors: Press the small tab inward while pulling straight out
- Slide-lock connectors: Slide the lock mechanism to the unlock position before pulling
- Bayonet-style connectors: Twist counterclockwise slightly while pulling
- Weather-pack connectors: Squeeze both sides of the locking mechanism evenly
Step 5: Remove the Connector Gently
Once the locking tab is released, pull the connector straight out with a steady, gentle motion. If it feels stuck, do not force it. Double-check that you have released all locking mechanisms first.
Inspect the connector for any signs of corrosion, dirt, or damage. Dirty connectors can cause poor electrical connections even after reassembly.
Common Toyota Electrical Connectors and How to Handle Them
Toyota vehicles use several types of electrical connectors. Each type requires a slightly different approach for safe removal.
Weather-Pack Connectors
Weather-pack connectors are weather-resistant and commonly used in Toyota engines and exterior applications. They have a rubber seal that protects against moisture. To disconnect these, squeeze the two sides of the locking mechanism simultaneously. Then pull the connectors apart. They may require a bit more force than standard connectors, but never use excessive pressure.
Toyota Sensor Connectors
Sensor connectors are small and delicate. They often connect to critical components like the oxygen sensor, mass airflow sensor, or crankshaft position sensor. These connectors typically use a push-tab locking mechanism. Use your connector release tool to gently press the tab and pull the connector straight out.
Fuse Box and Relay Connectors
The Toyota fuse box contains multiple relay connectors. These are larger and carry more current. Before removing a relay connector, make sure you have identified the correct one using the fuse box diagram. Push the relay straight out of its socket. For inline fuse connectors, use the fuse puller tool to avoid damaging the fuse clip.
Multiplex Connectors
Modern Toyota vehicles use multiplex connectors that handle multiple circuits in a single plug. These are more complex and should be handled with extra care. Refer to a Toyota wiring diagram specific to your model year before attempting removal.
Safety Tips and Precautions
Working with electrical connections requires attention to safety. These precautions protect you and your Toyota from harm.
Here are the most important safety tips to follow:
- Always disconnect the negative battery terminal first before working on any electrical component.
- Wear rubber gloves and safety glasses to protect against accidental sparks or chemical exposure.
- Never work on electrical connections with the battery still connected unless you are specifically testing a live circuit.
- Keep liquids away from electrical connectors and battery terminals at all times.
- Do not use excessive force when removing connectors. If something is stuck, stop and investigate why.
- Avoid working near open flames since car batteries can produce hydrogen gas.
- Wait five minutes after disconnecting the battery before touching any wiring to allow capacitors to discharge.
Common Mistakes to Avoid
Even experienced DIYers make mistakes. Here are some common errors to watch out for:
- Pulling wires instead of the connector body: This can break internal wires and damage the harness.
- Forcing a stuck connector: This can bend or break the locking tabs.
- Forgetting to take photos: You may struggle to remember where each connector goes during reassembly.
- Mixing up connector types: Some connectors look similar but serve completely different functions.
- Skipping the dielectric grease: This protective coating prevents corrosion and ensures good electrical contact.
Expert Insight: When to Seek Professional Help
While most electrical disconnections are straightforward, some situations call for a professional. If you are dealing with a complex multiplex connector, an airbag connector, or any connector related to safety systems, it is wise to consult a certified Toyota technician. Airbag connectors carry stored voltage that can be dangerous if handled improperly.
Also, if you are unsure about a specific connector location or function, refer to a Toyota-specific wiring diagram or contact a dealership service department. It is always better to ask for help than to risk damaging expensive components.
Reconnecting and Testing Your Toyota Electrical System
Once you have completed your work, it is time to reconnect everything. Follow these steps carefully to ensure a safe and successful reassembly.
- Inspect each connector for dirt, corrosion, or damage before reconnecting. Clean any dirty terminals with a wire brush or terminal cleaner.
- Apply a thin layer of dielectric grease to each connector before reassembly. This protects against moisture and corrosion.
- Push each connector back in firmly until you hear or feel the locking tab click into place.
- Double-check every connection against your photos or labels from before disconnection.
- Reconnect the positive battery terminal first and tighten the nut securely.
- Reconnect the negative battery terminal last and tighten it down.
- Turn the ignition on and check for any warning lights on the dashboard.
- Test all affected systems to make sure everything is working properly.
If you see a warning light on the dashboard after reconnection, do not panic. This is normal after disconnecting the battery. The Toyota ECU may need a few drive cycles to relearn certain parameters. If the light stays on after a few days, use an OBD-II scanner to check for error codes.
Quick Tip: Apply Dielectric Grease Correctly
A little dielectric grease goes a long way. Apply a thin, even coat to the inside of the connector housing. Do not use too much, as excess grease can attract dirt and debris. The grease should make contact with the metal terminals without filling the entire connector.
Maintenance Tips for Toyota Electrical Connections
Keeping your Toyota electrical connections clean and secure helps prevent future problems. Here are some simple maintenance tips you can follow regularly.
- Inspect connectors every six months for signs of corrosion or loose fitting
- Clean battery terminals with a wire brush at least twice a year
- Apply dielectric grease to exposed connectors during routine maintenance
- Check for cracked or damaged wiring near hot engine components
- Tighten any loose connectors you notice during routine checks
- Keep the engine bay clean to prevent dirt and moisture from affecting connections
Regular maintenance extends the life of your Toyota electrical system. It also helps you catch small issues before they become expensive repairs.
Final Thoughts
Disconnecting Toyota electrical connections safely is a skill every Toyota owner should have. With the right tools, a little patience, and the steps outlined in this guide, you can handle most electrical tasks on your own. Always prioritize safety, take your time, and never hesitate to consult a professional when needed.
Remember to disconnect the negative battery terminal first, release all locking tabs gently, and never pull on the wires. These simple habits protect both you and your vehicle. Whether you are a beginner or a seasoned DIYer, these practices will serve you well for every electrical job on your Toyota.
Now that you know how to disconnect Toyota electrical connections with confidence, you are ready to take on your next project. Grab your tools, follow the steps, and enjoy the satisfaction of handling the work yourself.
Frequently Asked Questions
Can I disconnect the Toyota battery without losing my radio settings?
In most Toyota models, disconnecting the battery will reset the radio settings and clock. Some newer Toyotas have a radio code that you will need to re-enter after reconnecting the battery. Keep your radio code in a safe place before disconnecting the battery to avoid this issue.
How long should I wait after disconnecting the Toyota battery before touching wires?
You should wait at least five minutes after disconnecting the battery. This allows the capacitors in the electrical system to fully discharge. It also resets sensitive electronic modules like the engine control unit and radio, reducing the risk of electrical damage.
What should I do if a Toyota connector feels stuck and will not come out?
If a connector feels stuck, do not force it. Double-check that you have released all locking tabs and mechanisms. Sometimes moisture or corrosion can cause connectors to seize. Spray a small amount of electrical contact cleaner around the connector and wait a few minutes before trying again.
Is it safe to disconnect Toyota electrical connections in the rain?
It is best to avoid working on electrical connections in wet conditions. Moisture can cause short circuits and increase the risk of electrical shock. If you must work in the rain, wear rubber gloves, ensure the battery is disconnected, and keep all exposed connections covered until the work is complete.
Do I need to reset anything after reconnecting Toyota electrical connections?
After reconnecting the battery, some Toyota systems may need a brief reset. Your radio, clock, and power windows may need to be reprogrammed. Some models also require the ECU to relearn driving patterns over several drive cycles. Most systems will return to normal automatically within a few days.
Can I use WD-40 on Toyota electrical connectors?
WD-40 is not recommended for electrical connectors. It is a solvent and can leave a residue that attracts dirt and interferes with electrical contact. Use dielectric grease instead, which is specifically designed to protect electrical connections from moisture and corrosion without affecting conductivity.
=== CONCLUSION ===
Disconnecting Toyota electrical connections safely is straightforward once you know the proper steps. From gathering the right tools to following the step-by-step process, this guide gives you everything you need. Always prioritize safety, take photos before disconnecting, and handle each connector with care.
With regular maintenance and careful handling, your Toyota electrical connections will stay in great shape for years to come. Now go ahead and take on that next project with confidence.