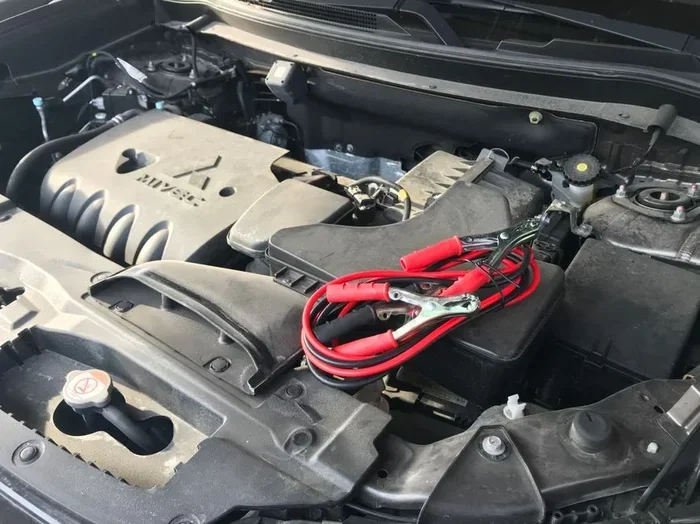
How to Disconnect Your Car Battery Safely and Easily
Learn how to safely disconnect your car battery with this simple step-by-step guide. You’ll discover the right tools, safety precautions, and common mistakes to avoid. Whether you’re replacing a dead battery or storing your vehicle, this how to disconnect car battery tutorial makes it easy.
There are many reasons you might need to disconnect your car battery. Maybe the battery is dead and needs a jump. Perhaps you’re storing the vehicle for the winter. Or maybe you’re replacing an old battery with a new one. Whatever the reason, learning how to disconnect car battery safely is a skill every car owner should know.
It might seem intimidating at first. But with the right steps and a little confidence, you can do it in under 15 minutes. This guide walks you through the entire process. You’ll learn what tools you need, the correct order of cable removal, and how to avoid common mistakes. I’ll also share expert tips that make the job safer and easier.
By the end of this article, you’ll feel ready to handle your own battery disconnect. No more calling a tow truck for simple tasks. Let’s get started.
Key Takeaways
- Always disconnect the negative terminal first: This prevents short circuits and sparks near the battery.
- Gather the right tools: A 10mm wrench, safety glasses, and gloves are essential for a safe disconnect.
- Use a memory saver device: It preserves your car’s computer settings while the battery is off.
- Never remove the positive cable first: Doing so can cause dangerous arcs and damage to the electrical system.
- Inspect terminals after disconnecting: Look for corrosion and clean them with a baking soda solution.
- Know when to call a pro: If you’re uncomfortable or dealing with complex wiring, seek professional help.
📑 Table of Contents
Why You Might Need to Disconnect Your Car Battery
Disconnecting the battery isn’t just for mechanics. Car owners face several situations where a full disconnect is necessary. Understanding these reasons helps you prepare mentally and physically.
When Disconnecting Makes Sense
You might need to disconnect the battery for a few key reasons:
- Battery replacement: A dead or aging battery needs to come out. You can’t remove it while cables are attached. This is the most common reason for a car battery disconnect.
- Long-term storage: If you’re storing a car for weeks or months, disconnecting the battery prevents parasitic drain. Small electrical draws from clocks and alarm systems can flatten a battery over time.
- Electrical work: Installing a new stereo, alarm system, or dash cam often requires a battery disconnect for safety. It eliminates the risk of short circuits while you’re wiring.
- Corrosion cleanup: Dirty terminals need cleaning. A disconnect gives you full access to the cable ends and posts. You can scrub away buildup without worrying about sparks.
Battery Disconnect Switches
Some vehicles come with a battery disconnect switch on the negative cable. This small lever or knob lets you cut power without tools. If your car has one, use it before reaching for the wrench. It’s a quick way to isolate the system. For older cars without a switch, a manual disconnect is the standard approach.
Benefits of a Full Disconnect
A full disconnect offers more than just access. It completely isolates the electrical system. This eliminates any risk of accidental shorts while you work. It also resets certain electronic modules, which can clear minor error codes. However, remember that a disconnect may reset your radio presets and clock. Some modern cars may also need a relearn procedure for power windows and the sunroof after a car battery disconnect. Always consult your owner’s manual for specific guidance on car battery maintenance after a disconnect.
Safety First: Gear and Preparation
Safety comes before speed. Working around a car battery involves sulfuric acid and electrical energy. Taking a few minutes to prepare protects you and your vehicle. Here are the key safety precautions when disconnecting battery steps.
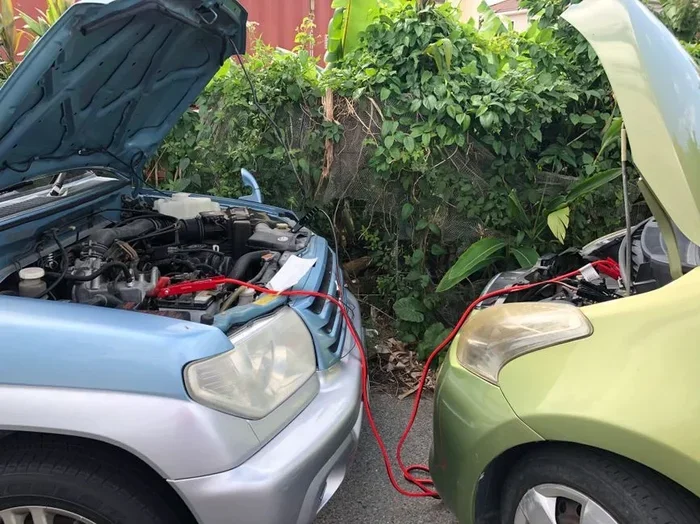
Visual guide about car battery disconnect
Image source: images.pexels.com
Essential Safety Gear
Before you touch anything, gather these items:
- Safety glasses: Protect your eyes from any acid splash or spark. Battery acid can cause serious eye injuries.
- Insulated gloves: Rubber gloves prevent electrical shock and skin contact with battery acid. Look for gloves rated for automotive work.
- Closed-toe shoes: Metal tools can slip and cause injury. Protect your feet from heavy battery components.
- Battery terminal cleaner: A wire brush tool that fits over the terminal post. It makes cleaning quick and effective.
- Old rags or paper towels: For wiping up any corrosion or spilled electrolyte.
Preparing Your Vehicle
Park the car on a flat, level surface. Turn off the ignition and remove the key. Engage the parking brake. If your car has a memory saver device, you can plug it into the OBD-II port now. This device preserves your computer settings while the battery is disconnected. It’s a small investment that saves you from resetting radios and navigation systems. Also, remove any jewelry like rings or watches. Metal jewelry can accidentally touch both terminals and cause a short circuit. Work in a well-ventilated area because batteries can release hydrogen gas.
Step-by-Step: How to Disconnect Car Battery Safely
This is the core of the guide. Follow these steps exactly. The order matters more than you might think. How to disconnect car battery safely means always removing the negative cable first.
Step 1: Locate the Battery
Open the hood and find the battery. In most cars, it’s near the front of the engine bay. Some vehicles hide it under a seat or in the trunk. Check your owner’s manual if you’re unsure. Once you find it, identify the two terminals. The positive terminal is marked with a red cover and a plus sign (+). The negative terminal has a black cover and a minus sign (-). The positive cable is usually thicker and may have a red stripe. The negative cable is typically black and connects directly to the car’s chassis or engine block.
Step 2: Remove the Negative Cable First
This is the most important rule in battery safety. The negative cable connects to the car’s chassis and ground. Removing it first breaks the circuit. If your wrench slips while you’re working, it won’t create a short to the metal frame. Here’s how to do it:
- Locate the negative terminal (black, marked with a minus sign).
- Place a 10mm wrench on the nut securing the cable clamp.
- Turn the nut counterclockwise to loosen it. You may need to wiggle the clamp gently.
- Once loose, carefully pull the cable end off the terminal. Do not let it touch the positive terminal or any metal part of the car.
- Tuck the negative cable away from the battery. I like to drape it over the hood or secure it with a zip tie.
Quick Tip: If the nut is stuck, spray a little penetrating oil and wait a minute. Never force it with excessive pressure. A battery terminal wrench can provide better grip and leverage.
Step 3: Remove the Positive Cable
Now that the negative is disconnected, you can safely remove the positive cable. The positive terminal is red and marked with a plus sign. Repeat the same loosening process. Once the clamp is free, pull it straight up and away. Keep the cable end away from the battery post. Remember, the positive cable still has power until the battery is completely isolated. The negative cable removal first ensures there’s no path for electricity to flow.
Step 4: Remove the Battery Hold-Down Clamp
Most batteries have a bracket or hold-down clamp that keeps them from moving. Look for a bolt or wing nut on the side of the battery. Use a socket wrench to remove it. Once the clamp is off, you can carefully lift the battery out. Batteries are heavy, so lift with your legs, not your back. If the battery is too heavy, ask a helper. Never tilt the battery sideways during removal, as this can spill electrolyte.
Step 5: Inspect and Clean
With the battery out, take a moment to inspect the terminals and cables. Look for white or blue-green powdery buildup. That’s corrosion. You can clean it with a mixture of baking soda and water. Use an old toothbrush to scrub the terminals. Wipe them dry with a clean rag. Also check the battery case for cracks or leaks. If the case is cracked, the battery needs replacement. Inspect the battery cables for frayed insulation. Damaged cables can cause intermittent electrical problems.
Expert Insight: Corrosion on the negative terminal often indicates a charging system issue. If you see excessive buildup, have your alternator tested before installing a new battery.
Tools and Gear: What You’ll Need
Having the right tools makes the job faster and safer. You don’t need a full mechanic’s toolbox. Just a few essentials will do the job. Here’s a look at the tools for battery disconnect and a comparison of memory saver options.
Memory Saver vs. Direct Disconnect
Before you start, consider whether you need a memory saver device. A memory saver plugs into the car’s diagnostic port and provides power to the computer while the battery is off. Here’s a quick comparison:
| Feature | Memory Saver | Direct Disconnect |
|---|---|---|
| Preserves radio and settings | Yes | No |
| Cost | $10-$30 | Free |
| Setup time | 2 minutes | None |
| Risk of electrical issues | Low | None if done correctly |
| Best for | Modern cars with complex computers | Simple tasks or older vehicles |
For most automotive battery disconnect jobs, a memory saver is a smart choice. It prevents the hassle of reprogramming your radio and power window auto-up features.
Recommended Tools for Battery Disconnect
Here’s a simple list of tools you should have ready:
- 10mm combination wrench: Fits most battery terminal nuts.
- Battery terminal cleaner: A wire brush tool that fits over the terminal post.
- Baking soda and water: For cleaning corrosion.
- Safety glasses and gloves: Non-negotiable for protection.
- Memory saver device (optional): Saves your car’s computer memory.
- Zip ties or electrical tape: To secure disconnected cables away from terminals.
- Penetrating oil: Helps loosen stuck terminal nuts.
Common Mistakes and How to Avoid Them
Even simple tasks can go wrong if you skip steps. I’ve seen many DIYers make the same errors. Here’s how to avoid them.
Mistake 1: Removing the Positive Cable First
This is the number one mistake. If you remove the positive cable while your wrench touches the metal car body, you create a short circuit. The battery can spark, potentially causing a fire or explosion. Always, always remove the negative first. Make it a habit. The negative cable removal breaks the ground path and makes the entire system safe.
Mistake 2: Letting Cables Touch Each Other
After removing the negative cable, don’t let it dangle near the positive terminal. If the two cables touch, they complete the circuit. That can cause a spark and damage the electrical system. Tuck the negative cable away immediately. Use a zip tie to secure it to the hood or away from the battery area.
Mistake 3: Forcing a Stuck Terminal
Corrosion can make the terminal nut very tight. Forcing it with a wrench can break the terminal post or crack the battery case. Apply penetrating oil and let it sit for a few minutes. Use a proper-sized wrench and steady pressure. A battery terminal wrench with a ratcheting feature can help you loosen stubborn nuts without excessive force.
Mistake 4: Skipping the Inspection
Once the battery is out, don’t just toss it aside. Inspect the battery tray for corrosion. Check the cables for frayed insulation. A quick inspection now can prevent problems later. Look at the battery hold-down clamp and bracket. If they’re rusty or damaged, replace them before installing the new battery.
When to Call a Professional and Final Thoughts
Most car owners can disconnect a battery without any help. But some situations call for a trained hand. Knowing when to stop and call a pro keeps you safe.
Complex Electrical Systems
Modern vehicles have dozens of computers and sensors. If your car has a start-stop system, advanced driver assistance, or a complex aftermarket install, the battery disconnect procedure might be different. Consult a professional if you’re unsure. Some vehicle battery maintenance tasks require specialized diagnostic equipment.
Battery in an Inaccessible Location
Some cars hide the battery under the rear seat or in the trunk. If you can’t comfortably reach the terminals, it might be safer to let a mechanic handle it. They have the right tools and experience. A cramped engine bay can make the car battery disconnect process frustrating and dangerous.
If You’re Also Wondering How to Remove the Battery
If you’re also wondering how to remove car battery, the process starts with a full disconnect. Once the cables are off and the hold-down clamp is removed, you can lift the battery out. Always carry the battery upright to avoid spilling acid. Place it on a stable surface and recycle it properly at an auto parts store.
After Disconnecting, What Next?
If you’re disconnecting for storage, consider using a battery maintainer or trickle charger. This keeps the battery charged without overcharging it. If you’re replacing the battery, make sure the new one matches the group size and cold cranking amps (CCA) rating of your old battery. Once you reconnect, you’ll need to reset some systems like the power windows and sunroof. A battery maintainer is also great for long-term storage.
How to disconnect car battery safely is a straightforward process once you know the steps. You just need patience, the right tools, and a healthy respect for the electrical system. Never rush, and always follow the negative-first rule. With this guide, you can handle battery replacement, storage, or electrical work with confidence. Remember to keep your safety gear on, inspect your terminals, and store the old battery properly. If anything feels off, don’t hesitate to seek professional help. Your safety is more important than saving a few dollars. Now you know exactly how to disconnect your car battery. Go ahead and give it a try.
Frequently Asked Questions
What happens if you disconnect the positive terminal first?
Disconnecting the positive terminal first can cause a short circuit if your wrench touches the metal car body. This creates a spark that could ignite battery gases and cause an explosion. Always remove the negative cable first to break the ground circuit safely.
Do I need a memory saver when disconnecting the battery?
A memory saver is not strictly required, but it’s highly recommended for modern cars. It preserves your radio presets, power window settings, and navigation data. Without it, you may need to reset these systems after reconnecting the battery.
How long can a car sit with the battery disconnected?
A car can sit for weeks or even months with the battery disconnected. The main drain comes from the battery itself, which slowly loses charge over time. For long storage, consider using a battery maintainer to keep it topped up.
What tools do I need to disconnect a car battery?
You need a 10mm wrench or socket, safety glasses, insulated gloves, and a battery terminal cleaner. A memory saver device is optional but helpful. Baking soda and water are useful for cleaning corrosion.
Can I disconnect the battery while the car is running?
No, never disconnect the battery while the engine is running. The alternator charges the battery while driving. Removing it suddenly can cause voltage spikes that damage the car’s computer and electrical components. Always turn off the ignition first.
Is it safe to touch both battery terminals at once?
No, touching both terminals at the same time can complete the circuit through your body. This causes an electric shock and potential burns. Always work on one terminal at a time and keep metal tools away from both posts simultaneously.